Kia Stinger CK: Features of your vehicle / Instrument cluster
Contents:
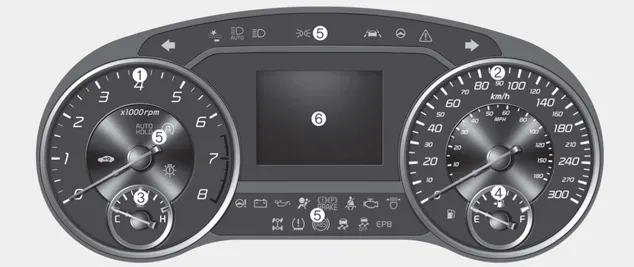
■ Type A
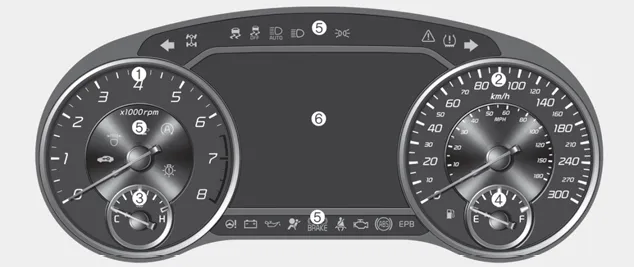
■ Type B
1. Tachometer
2. Speedometer
3. Engine coolant temperature gauge
4. Fuel gauge
5. LCD display
6.Warning and indicator lights
Instrument Cluster Control
Adjusting Instrument Cluster Illumination
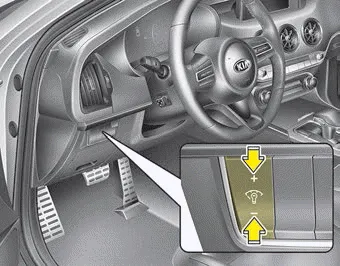
The brightness of the instrument panel illumination is changed by pressing the illumination control button (“+” or “-”) when the Engine Start/Stop button is ON, or the taillights are turned on.

- If you hold the illumination control button (“+” or “-”), the brightness will be changed continuously.
- If the brightness reaches to the maximum or minimum level, an alarm will sound.
LCD Display Control
■ Type A
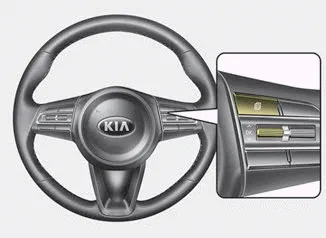
■ Type B
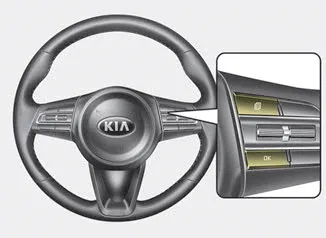
The LCD display modes can be changed by using the control buttons on the steering wheel.
(1)
 : MODE button for changing modes
(2)
 /OK : SELECT scroll switch for setting
the selected item and RESET scroll switch for resetting items
/OK : SELECT scroll switch for setting
the selected item and RESET scroll switch for resetting items
❈ For the LCD modes, refer to “LCD Window” in this chapter.
Gauges ➤
Transaxle Shift Indicator
Automatic Transaxle Shift Indicator
![]()
This indicator displays which automatic transaxle shift lever is selected.
- Park :P
- Reverse : R
- Neutral : N
- Drive :D
- Sports Mode : 1, 2, 3, 4, 5, 6, 7, 8


Other information:
Kia Stinger (CK) 2018-2023 Owner's Manual: How to use the Smart Liftgate
The liftgate can be opened with notouch activation satisfying all the conditions below. After 15 seconds when all doors are closed and locked Positioned in the detecting area for more than 3 seconds. ✽ NOTICE • The Smart Liftgate does not operate when: - The smart key is detected within 15 seconds after the doors are closed and locked, and is continuously detected.Kia Stinger (CK) 2018-2023 Owner's Manual: Auto Lighting Control System
Specifications Specifications Items Specifications Rated voltage 5V Load Max. 1mA (Relay load) Illuminations (LUX) 50 0.98 ± 0.2 V 150 1.74 ± 0.38 V Components and components location Component Location 1.Categories
- Manuals Home
- Kia Stinger Owners Manual
- Kia Stinger Service Manual
- New on site
- Most important about car
Contents
